Windows Server Backup in Windows Server 2016
Windows Server Backup (WSB) is built in backup utility in Windows Server 2016/2012 R2/2012/2008 R2/2008. It has a series of wizards that helps you to create basic backups and perform recovery tasks whenever you need. The new Windows Server 2016 has the potential to be problematic, so it is rather crucial for creating a system image backup windows Server 2016. You can use WSB to perform a full server backup(including all volumes), specified volumes or partitions backup, system state backup, or specific files or folders backup. Since Windows Server 2012, WSB supports 4K sector advanced format hard drive and partitions larger than 2TB, so you can create a full server backup more easily. If something bad like hard disk failures, system crushes, happens, you can run a bare metal recovery to make everything back on track without worrying about data loss.
Create a system image backup in Windows 2016 with WSB
Before you can use Windows Server Backup, you need to install it first. You can go to Server Manager\Role-based or Feature based installation\Server, under the Features Wizard tab, check the Windows Server Backup Feature, and click Install. When you complete the installation, which won’t take long, you can click Start, Administrative Tools, and then select Windows Server Backup.
1. Under Action tab, click Backup Once for a one time backup job, and click Next to continue in the Backup Once Wizard. If you want to create a scheduled backup, click Backup Schedule instead.
2. Check Custom for backup configuration and click Next.
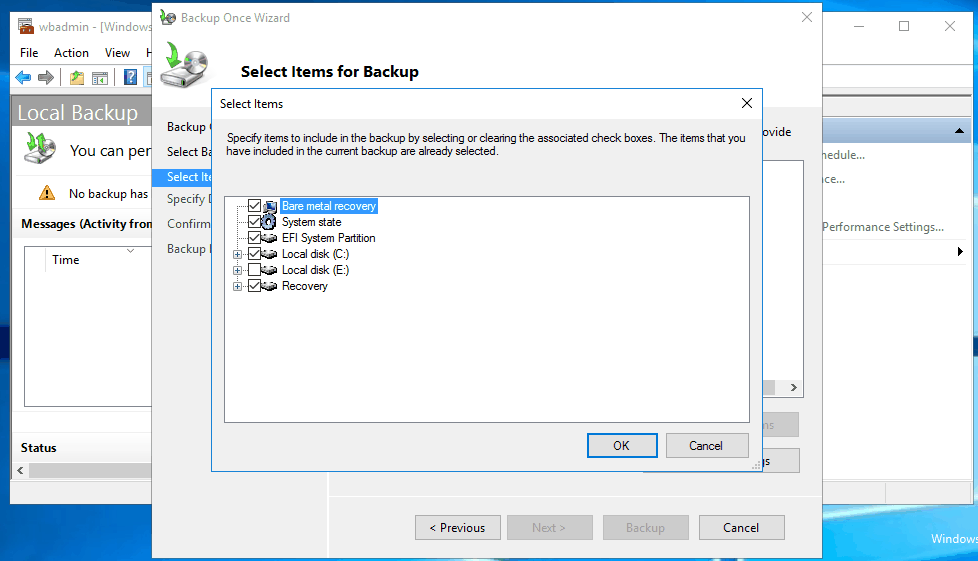
3. Click Add Items option. In the next screen, check Bare metal recovery, which will automatically check the required items for bare metal recovery, and click OK.
4. Specify destination location to save the image backup, you can choose the local drives or remote shared folder.
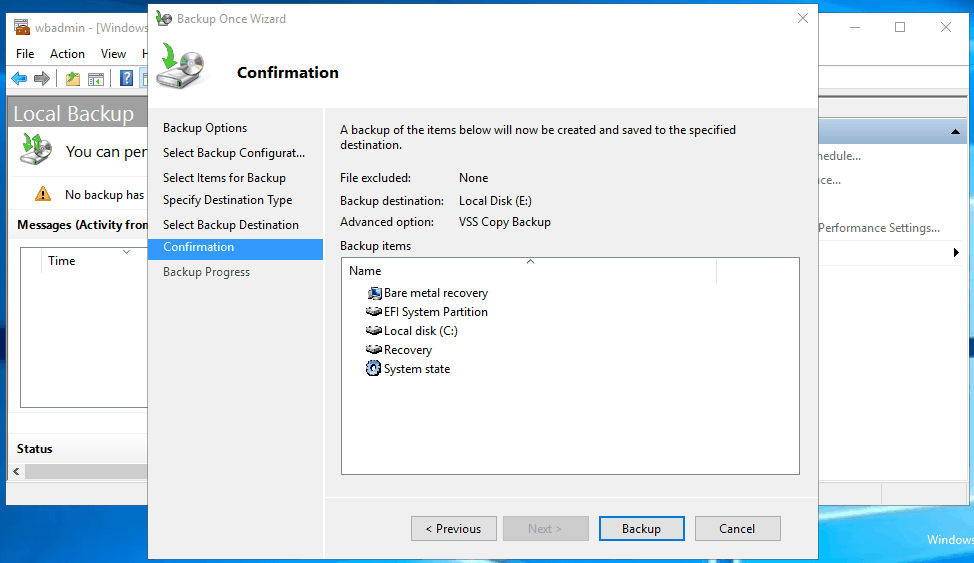
5. WSB will show you a confirmation screen. If no problems, click Backup to perform image backup for Windows Server 2016.
It will take a long while for the Windows Server image backup to complete. Once the backup is done, if you want to create another backup, you have to specify the destination to another location because new backup will overwrite the previous one on the same location. If what you created is a scheduled backup task, you can either modify the scheduled backup or delete it when you want to create a new scheduled backup. If you want to get rid of these restrictions, you can use the third party backup software.
Server 2016 system image backup with third party backup software
A powerful Windows Server backup tool, AOMEI Backupper Server allows you to perform system image backup with only mouse-clicking. It supports FAT32, FAT16, EXT2, EXT3 besides NTFS; it helps you to keep as many scheduled backups as you want instead one, and it can use any locations that File Explorer detects without removing previous backups. With its intuitive main interface, you can easily create an image backup.
1. Download, install and launch the Windows Server backup software.
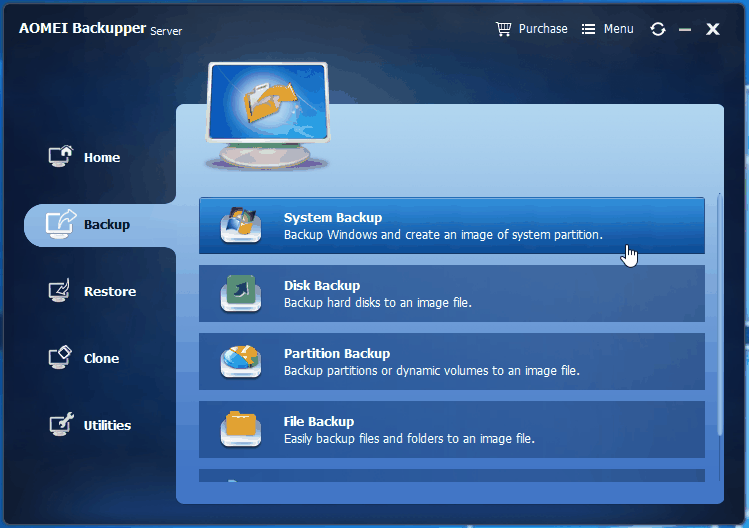
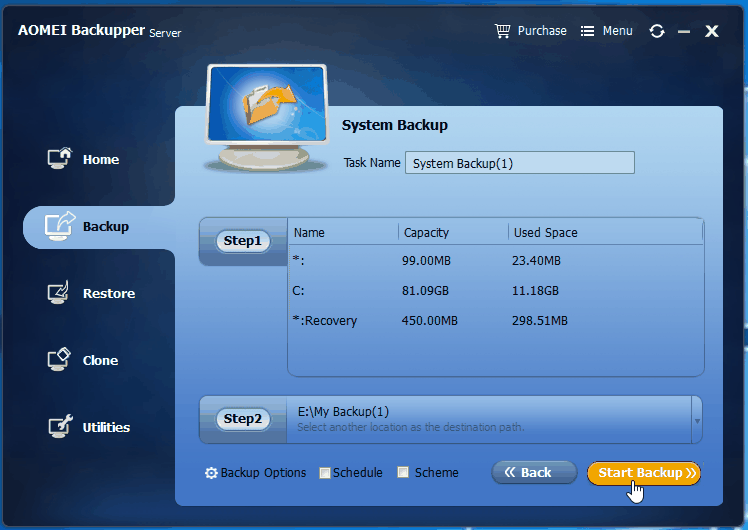
2. Under “Backup” tab, select System Backup. As you can see from the screenshot, it provides 4 types of backup to meet users’ needs.
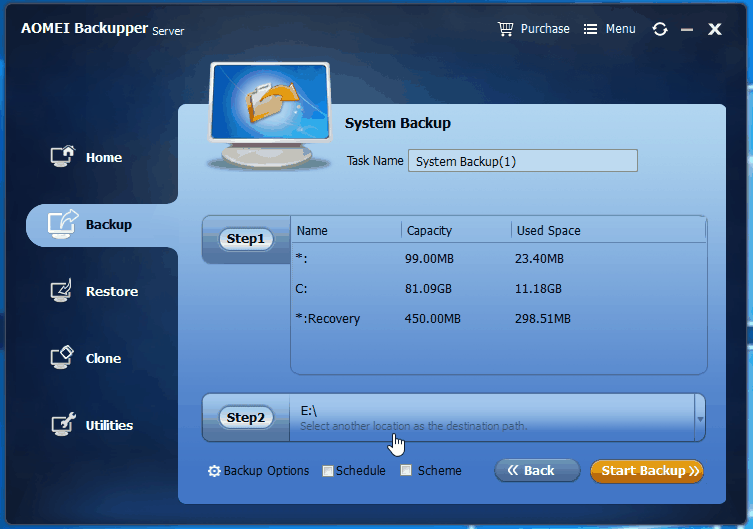
3. Click Step 2 to select a destination location to save the system backup as the program will automatically select the required partitions for a system backup. If you need to create a scheduled backup, just click the Schedule button and follow the instructions to configure a scheduled backup task before you click Start Backup. You can also configure full/incremental/differential backupsfrom there.
4. Click Start Backup to start the system image backup.
In a short while, AOMEI Backupper will create a system image backup in Windows Server 2016 for you. Once the backup task is finished, you can use it to restore to dissimilar hardware or identical hardware Server. With the ability to create bootable rescue media or AOMEI PXE Tool, you can easily restore your server even when it is unable to boot.
- ۹۷/۰۳/۱۷

